Creating a Feature
What is a Feature?
In Loops, a feature is an action users can take that will generate value for them (e.g. viewing a report, downloading a template). This action is represented by the occurrence of one or more events within your product.
Defining features within Loops is important because it gives meaning to events within your product, and helps you understand how people use certain parts of your product.
Features can be used in Loops analyses like Goal Drivers, which reveals the causal impact of features on the achievement of certain product goals.
Feature interaction levels
Users may interact with a feature on multiple levels, and you will define each of these levels when creating a new feature in Loops (see Step 7 below):
| Interaction level | What it means | Example | Potential analysis use case |
| Exposure | A user is exposed to the existence of the feature. | They visit a page that shows the “Export” button. | If you see that a low number of users are exposed to a feature, try to improve its discoverability. |
| Intent | A user shows intent to use the feature. | They press a button to start the export process. | If the conversation rate between exposure and intent is low, consider better explaining the value of the feature or changing its location. |
| Usage | A user actually uses the feature. | They finish exporting a document. | If the conversion rate between intent and usage is low, explore whether there’s a technical or UX problem that prevents users from using the feature. |
These definitions can then be used in analyses such as Feature Funnels, which helps you understand why users aren’t using a particular feature.
How to create a feature
- Log into Loops and click “Data Management” in the left-side navigation bar.
- Click “Features” in the left-side menu.
-
Click the Create Feature button at the top-right corner of the screen, and a dialog box will appear.
- Enter a name and description for the new feature.
- Select an entity for the feature – that is, whether it should include events on the “User” or “Account” level.
- Note that the list of available events will only include those from relevant views. For example: if you choose “User”, you may be able to create a feature based on the event “user_analysis_creation”, but not “account_analysis_creation”.
- Create or select a category you’d like to add the feature to (optional).
- For example, say you want to understand which mobile app features drive conversion within your product (using Goal Drivers analysis). To support this, you could create a group called “Mobile features”, which would only include features available in the mobile app.
- Select one or more events that define each interaction level for the feature:
- Exposure – event(s) that indicate a user was exposed to the feature
- Intent – event(s) that indicates a user had intent to use the feature
-
Usage – event(s) that indicate a user actually used the feature
At least one of the three steps must be defined.
For each event, an optional “where” clause allows you to specify additional conditions that need to be met for the event to be counted (e.g. “where device_type = mobile”).
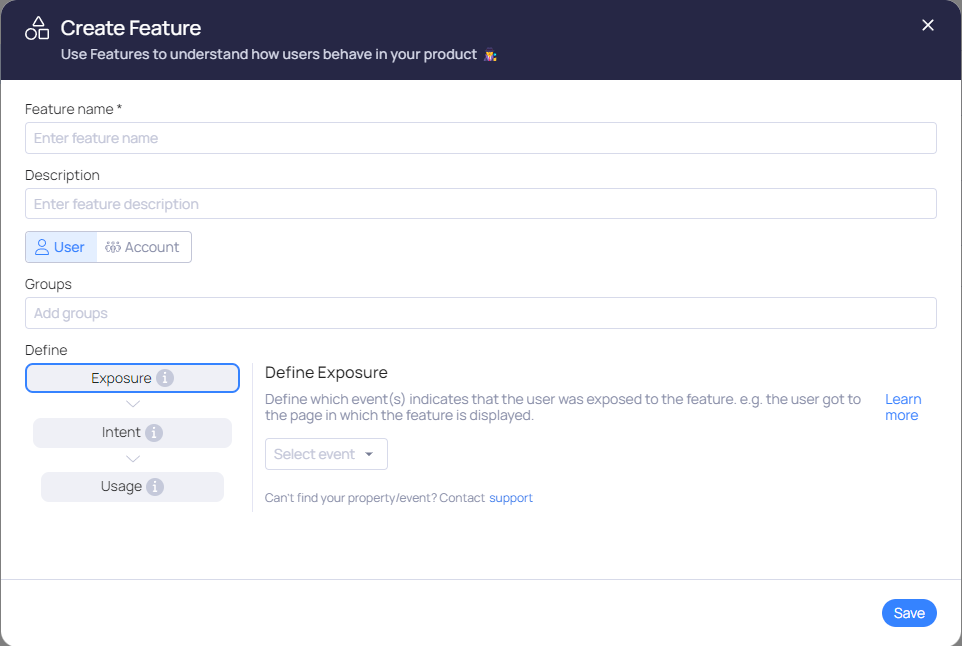
8. Click Save.
Once the feature has been successfully created, it will appear under “Features” on the Data Management page. From there, you’ll be able to edit, duplicate or delete it.
Note that you can also create features from the “Events” page in Data Management. To get started, simply hover over the relevant event and click the Create Feature button.
